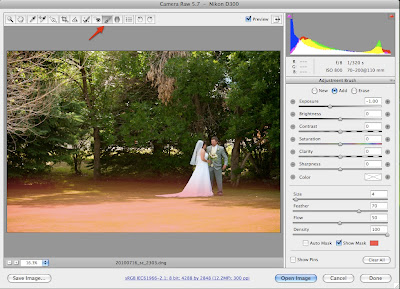
I stumbled on the Adjustment Brush tool in camera raw the other day and I'm hooked. It allows you to quickly mask exposure, contrast, and saturation adjustments without bringing the image into Photoshop.
This means you can fix hot areas of your image, brighten faces, etc., all without having to deal with big Photoshop files, because the changes are saved in your raw file. Just like any other raw adjustments, the changes are non-destructive and you can easily modify the masks later. Just make sure you're already using a DNG workflow, otherwise you're going to get separate, un-embedded (sidecar) files that store your raw changes.
The Adjustment Brush is available in Photoshop CS4 or later and Lightroom 2 or later.
Here are some real-world before and after examples of using the adjustment brush.
YouTube - (HD) Add drama with the Adjustment Brush in Photoshop CS4 & Lightroom 2 A quick primer on how to use the adjustment brush. Yes, this Brit's over processed images may burn your eyes, but you'll learn camera raw's powerful tool.
2 comments:
Oh man. I want that.
If you've got CS4 or lightroom 2, it's there waiting for you.
Post a Comment